
Tutorial of installing the LU3-20A Laser Module on Ortur Laser Engraver
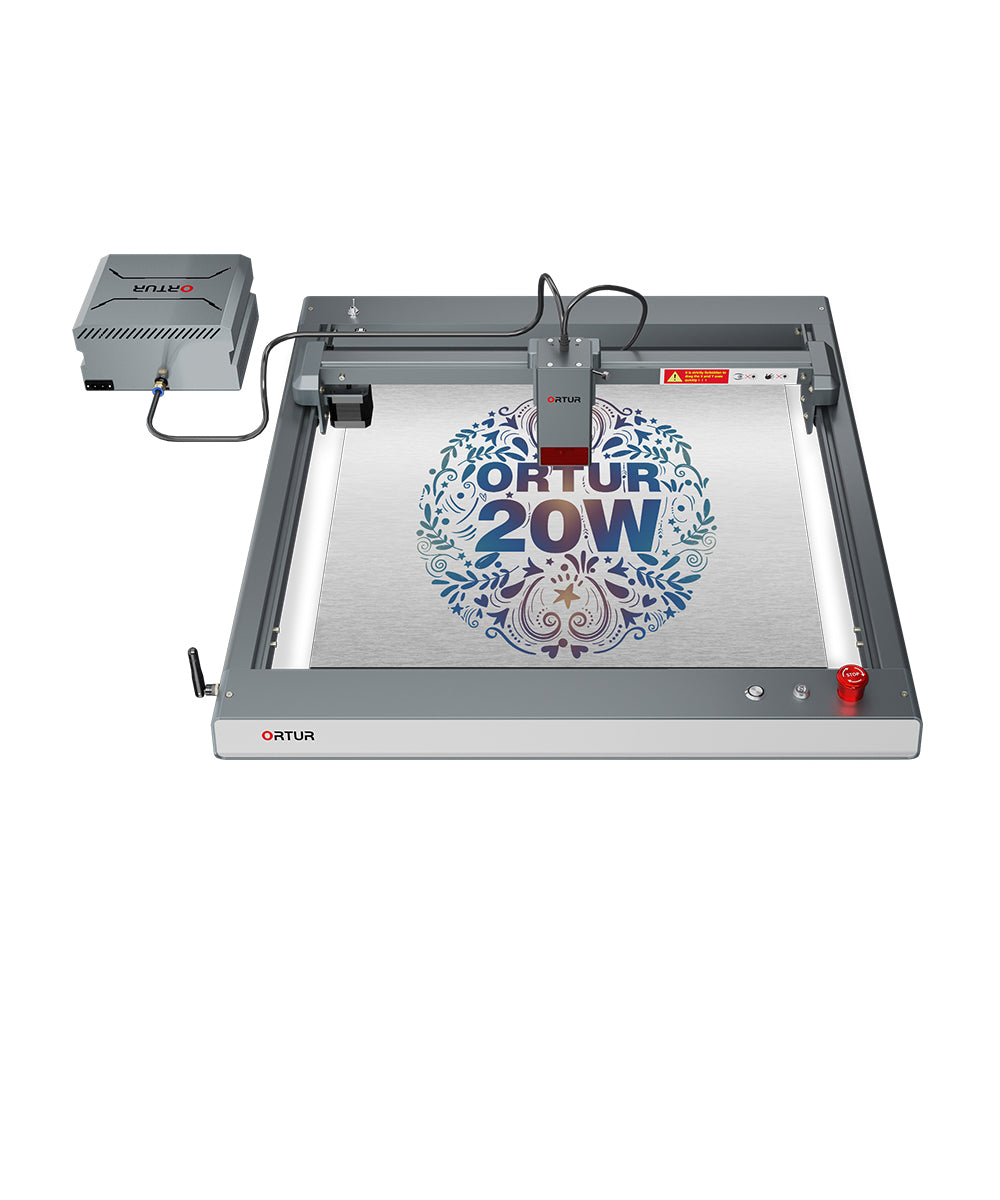
The 20W laser module is not only upgraded in terms of power, it applies advanced COS technology, which presses four 5W diodes into an extremely fine beam and maintains a powerful energy, enabling speeds of up to 20,000mm/min and perfect single cuts. In addition, it can also achieve colorful engraving effects on stainless steel, so you are no longer limited to black and white creations.
It is important to note that the 20W laser module is compatible with all of Ortur's laser engraving machines, but don't worry, the installation of the 20W laser module is very simple. This article will explain in detail how to install the 20W laser module on other laser engraving machines and there will be a video tutorial, so be sure to read it carefully!
Installed on Ortur Laser Master 3
· Install and fix the LU3-20A laser moudule with thumbscrew.

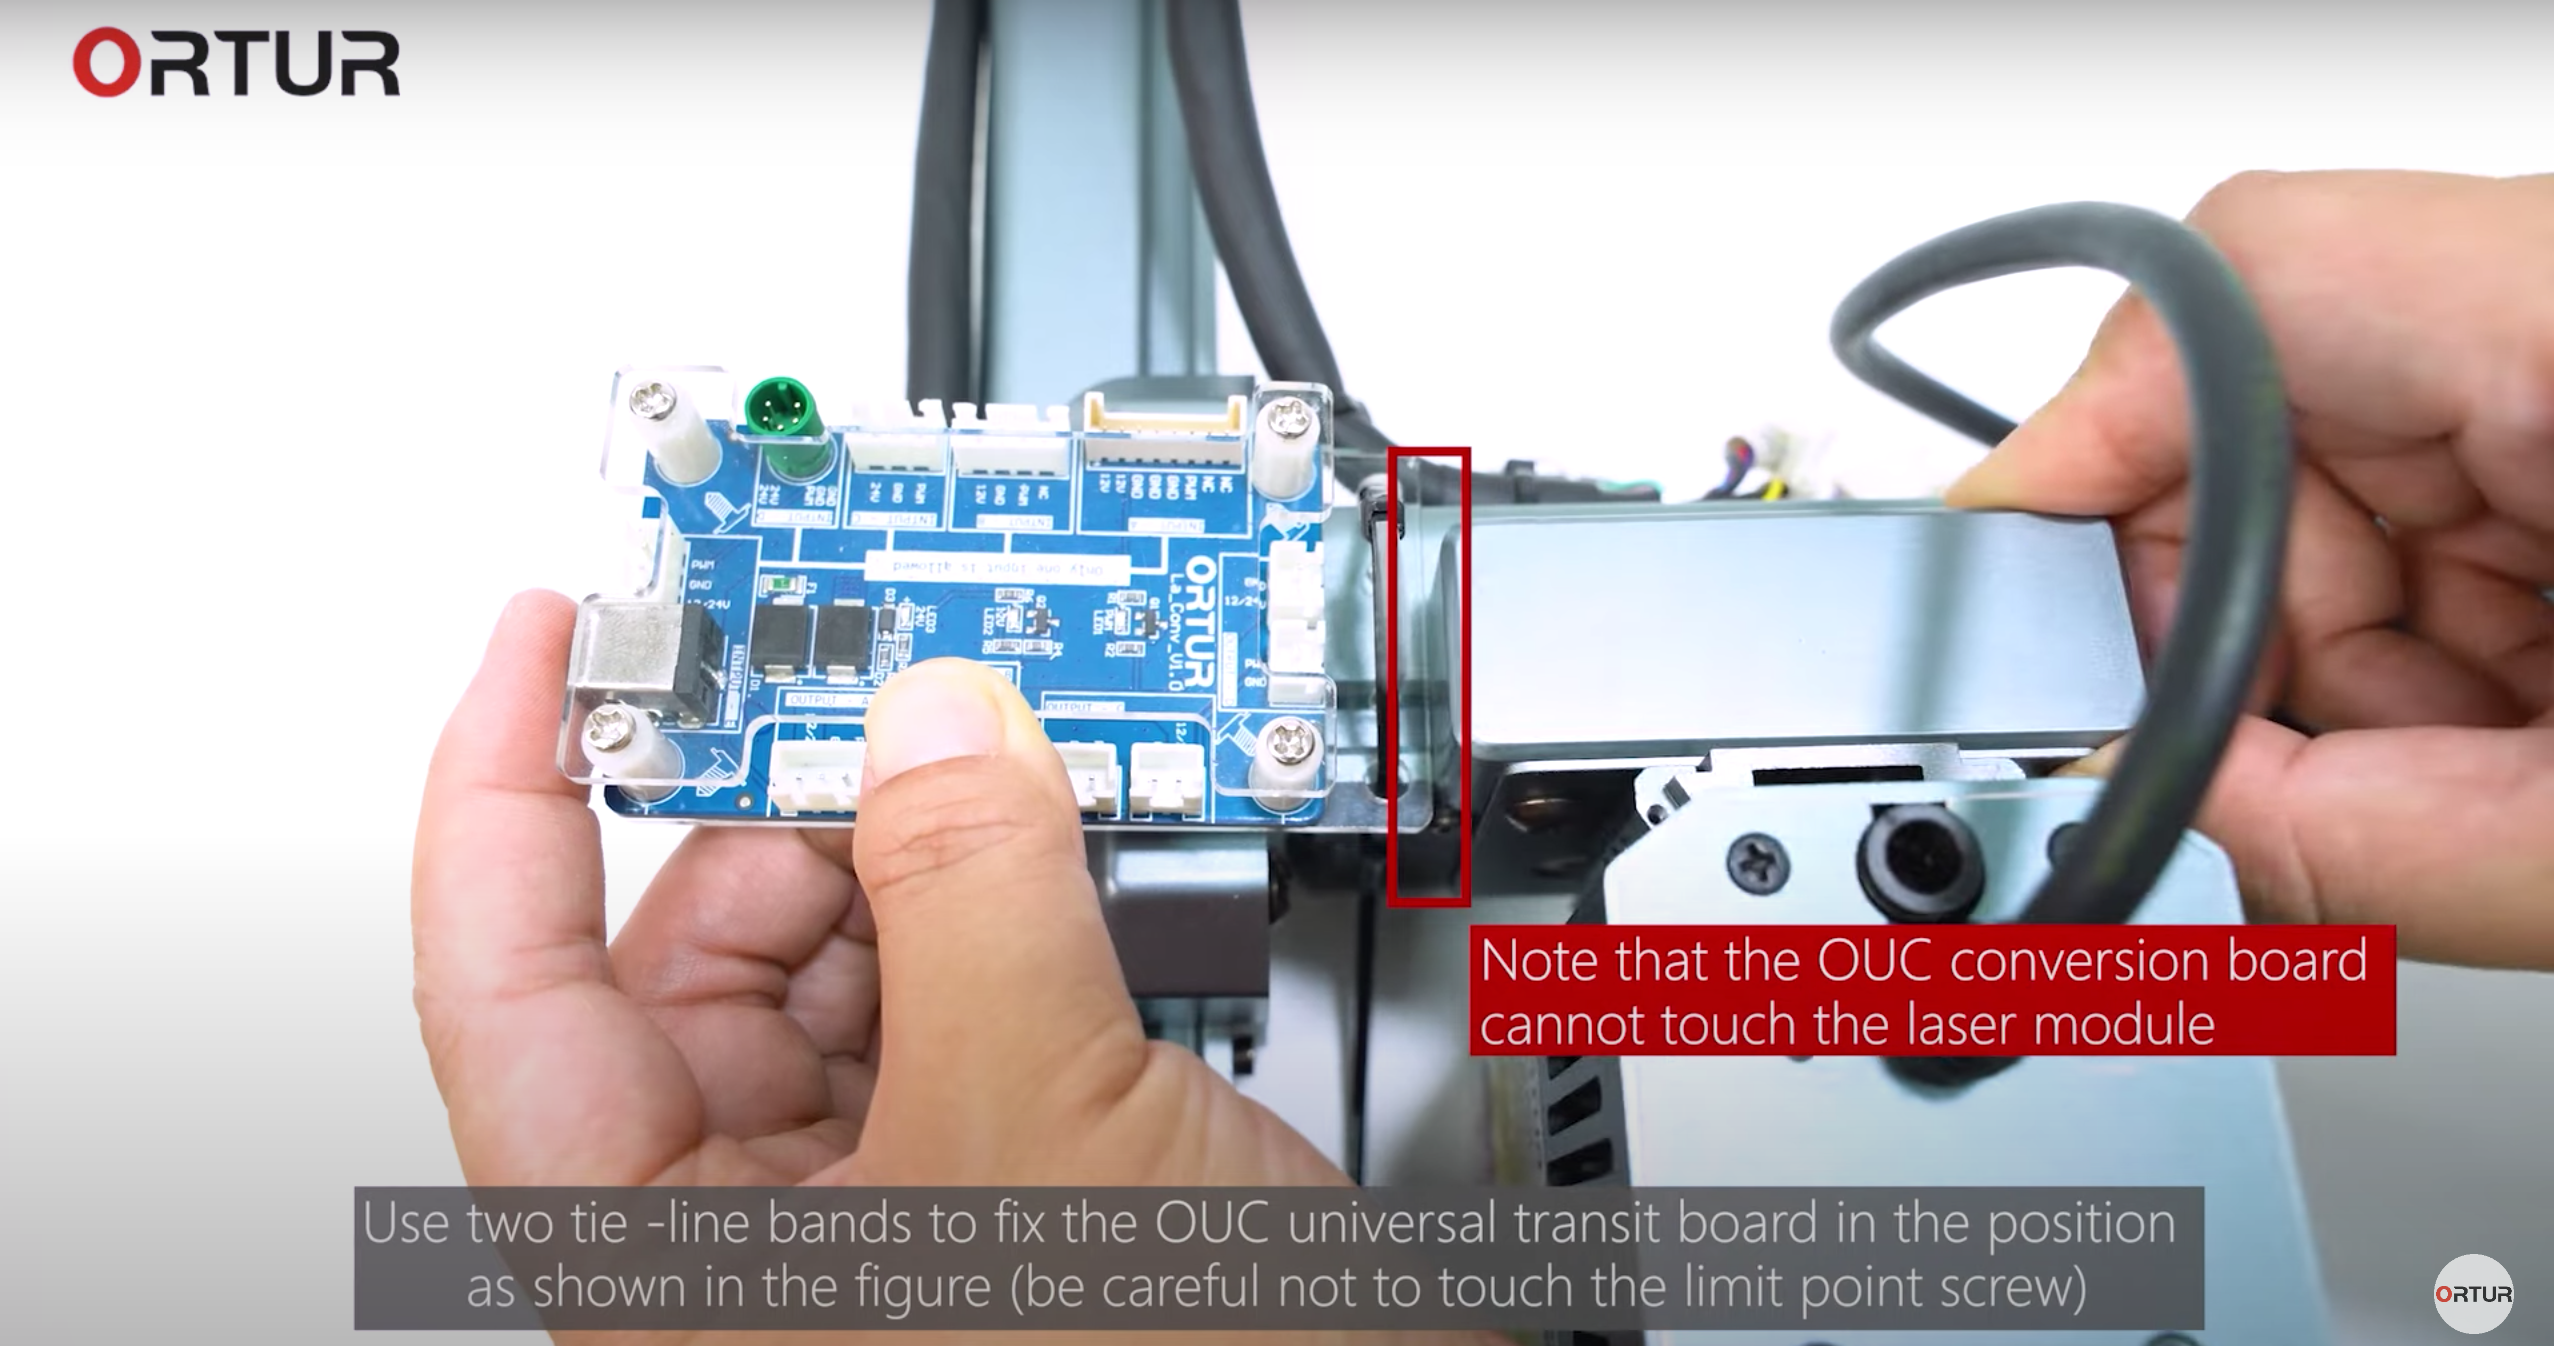
· Because of the power upgrade, the 20W laser module needs to be used with an OUC adapter board. Please note that when fixing the OUC adapter plate, please reserve the movable position of the laser module.

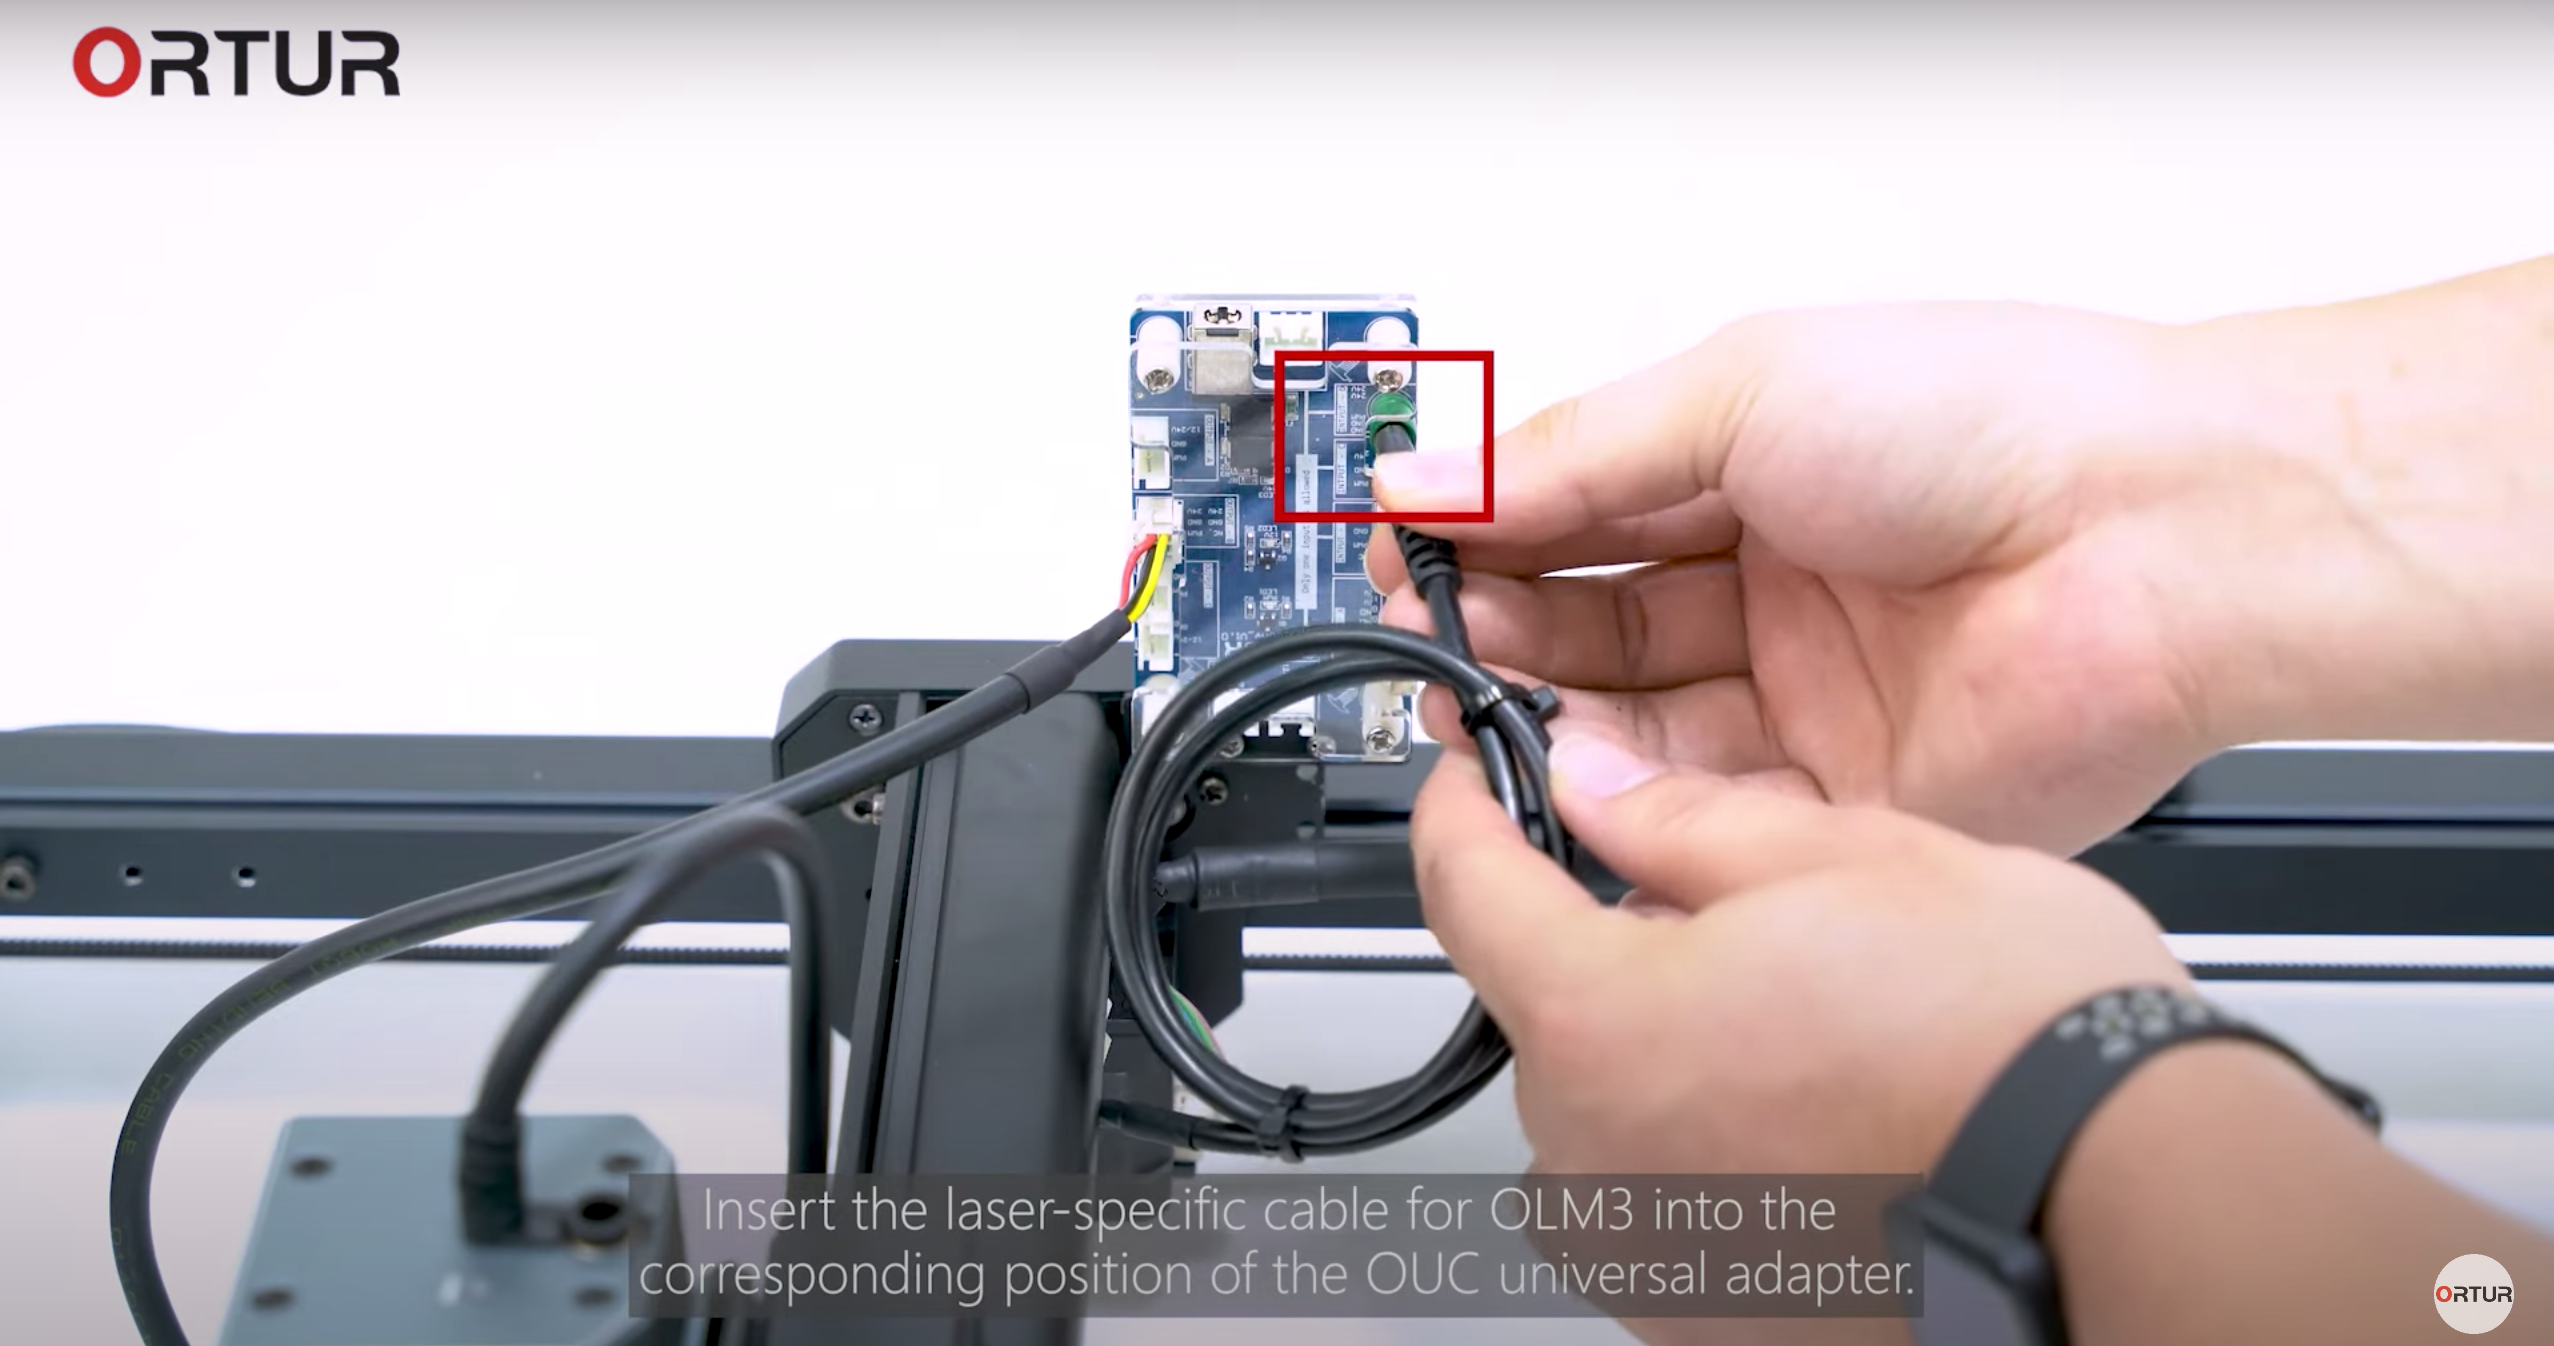
· Plug the LU3-20A laser module laser dedicated line and the OLM3 cable into the corresponding position on the adapter board.


· The OUC requires an external power supply.


· It is necessary to install the limit screws into the second hole, so that the module will not collide with the frame, and at the same time, the engraving area will become 400mm*380mm.


The above are installed after the 20W laser module is installed, it is best to use with the air pump together!
After all the above are installed 20W laser module is installed, it is best to use with the air pump.If you are still not sure how to operate, you can view the detailed installation video below.
Installed on Ortur Laser Master 3 LE
· Replacement of the 20W laser module, removal of the OLM3 LE original fixing bracket.


· Attach the fixing bracket for the OUC adapter plate.


· Plug all laser harnesses into the corresponding ports


· The OUC requires an external power supply.


· All wiring harnesses need to be organized to ensure that they do not interfere with the movement of the laser module. And you need to adjust the position of the limit screws to prevent collisions.


The above are installed after the 20W laser module is installed, it is best to use with the air pump together!
Installed on Ortur Laser Master 2 Pro S2
· If your old laser module is the LU2-4 SF/LF, you will need to replace the back plate that holds the laser module in place.

· Connect the wiring harness of the 20W laser module and the wiring harness of the OLM2 PRO S2 to the corresponding excuses on the OUC adapter board.


· Connect the OUC adapter plate to the dedicated power supply and tie the OUC in a position where it will not interfere with the operation of the machine.


· In order to prevent the laser module from hitting the front frame, please adjust the limit screws and adjust the tension of the belt at the same time.


You can check out more details in the video!
Keep in Touch with Ortur
Related Articles


3 Creative Ways to Cut a Shirt with a Laser Cutter
The Most Heartfelt Gifts: Personalized Christmas Decors with Ortur
Related Articles

Guide 2024: How to Bend Text in Word for Laser Engraving