A 2024 Guide: Using Red Color for
Laser Cutting in Illustrator
When using red color for laser cutting in Illustrator, sometimes things can get a little fuzzy and this article is your complete guide on how to deal with this color in your DIY project.
- Introduction
- Setting Up Red Color Lines in Illustrator
- Common Mistakes and Recommendations
- Conclusion
Introduction
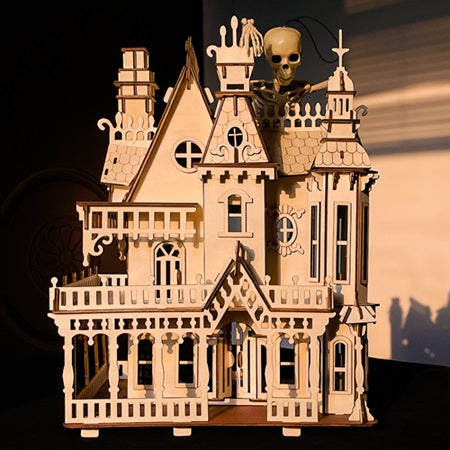
Using laser engraving to carve out difficult designs and personalized inscriptions onto different things has marked quite a turning point in the entire DIY industry. In such projects, one of the most difficult yet fulfilling skills to pull off is using more than one layer of a specific material over the first one, also termed as reverse engraving and it is now increasingly being used more and more by both newbies and pros of this niche.
The common problem in this multilayered reverse engraving is the material being “unengraved” due to the complexity of the design and the bottom layers left untreated by the laser module. To understand why this happens and how to avoid that, we need to go through the basics first.
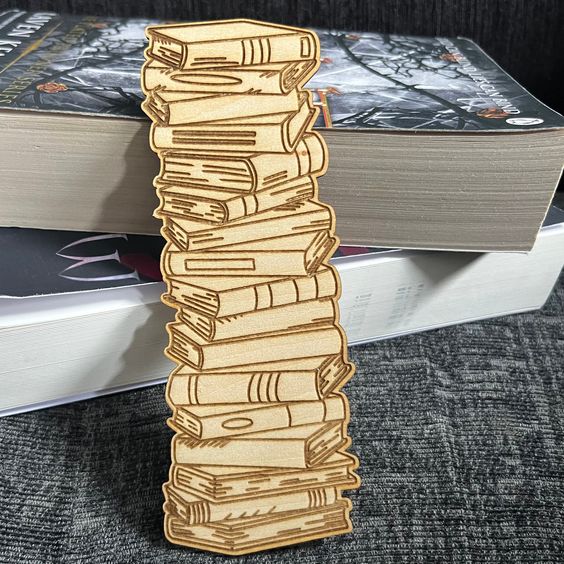
In the standard process of laser engraving, the laser vaporizes certain portions from the surface as parts of the design, which results in engraved areas appearing as recessed dark spots while the rest of the surface remains flushed. There is another way to do laser engraving i.e. reverse engraving (mentioned above) during which it is not the design that is engraved, but the laser eliminates the surrounding material around the design and happens due to an outline of a design, also known as a positive.
This positive area is cut out from the outside, so it appears as if the design is raised from the surface. For accurate cutting of this positive area, the right depth to the image is extremely crucial, and this is where the red color comes in. Almost all the manufacturers use this red color for laser cutting in Illustrator and to outline the cutting lines of positive areas. This color is easy to work with when dealing and is already standardized amongst the different OEMs.

Setting Up Red Color Lines in Illustrator
Since Adobe Illustrator remains one of the top software to be used in this industry, many people struggle when it comes to setting the red lining for the cutting of positive areas, which significantly affects the final results of the engraving. Follow the generalized method given below to get the best results when setting up the lines of red color for laser cutting in Illustrator.
1. Creating the Design: All created designs are not appropriate candidates for reverse depth engraving. The designs with strong outline hem and a few internal particulars work best. Geometry, logos, and occasionally typographical designs give great results so go with those but make sure that the design uses vectors and the document’s color mode is set to RGB in Adobe Illustrator.
2. Deginfing Red Lines: If you designed the file yourself, then you must be using the “Pen Tool” or “Shape Tools” in Illustrator to create the paths that will form your design. To define a red lining in this design for a positive cut, select the Stroke Color panel and set the color to red, i.e., RGB: 255, 0, 0, and 0.001 inches, i.e., 0.072 pt). This color configuration is recognized by the laser cutter as a command rather than an engrave or score.
3. Configuring other Commands: now your cut command for positive areas is set, you can now set the Engraving and Scoring Layers with other colors like black and blue for engraving and green for scoring.
4. Saving Files: Once you are done with the design file, export the design from Adobe Illustrator in the form of SVG, PDF, or DXF which are standard vector-preserving formats, and preserve all the details of the lines filled with red color for laser cutting in Illustrator.
Common Mistakes and Recommendations
1. One of the most common mistakes is incorrect stroke being too thick, which results in an error in reverse engraving as the laser will interpret the red line as an engraving path. Stick to 0.001 inches for cutting to avoid this.
2. Ensure that cutting and engraving paths don’t overlap unnecessarily, which will avoid any misperception for the laser module.
3. Always use vector images with no raster elements for the best results.
4. using smart and well-equipped laser hardware is equally important when dealing with reverse engraving. Always choose hardware that has high accuracy and comes with appropriate safety features.
Conclusion
Single and Multilayered engraving requires a clear design of red lines in the vector file to get accurate cutting and engraving of the base material. Capable hardware and software that make the design process is also crucial. For that, Ortur LM3 laser engraver and cutter is recommended for use in such projects where accuracy and flexibility in design files are extremely important, which is possible with Ortur’s Inspiraesth software optimized for its hardware.
Moreover, you also get the next generation of integrated air-assist systems and a laser module that has industry-leading standards of accuracy delivering error-free results. The support of a wide range of accessories also offers endless possibilities for the DIY community.