ORTUR R1 Laser Engraver Guide for Beginners: From Unboxing to Your First Engraved Creation
For beginners who are new to laser engravers, the most common worries are "being afraid to assemble after unboxing" and "fearing to ruin materials due to wrong parameter settings". This guide is specially designed for complete beginners. From unboxing inspection to finishing your first engraved work, each step comes with clear instructions and tips to avoid mistakes, allowing you to easily get started with the ORTUR R1 even with no prior experience.
Unboxing Inspection
Confirm "All Accessories Are Included" in 30 Seconds
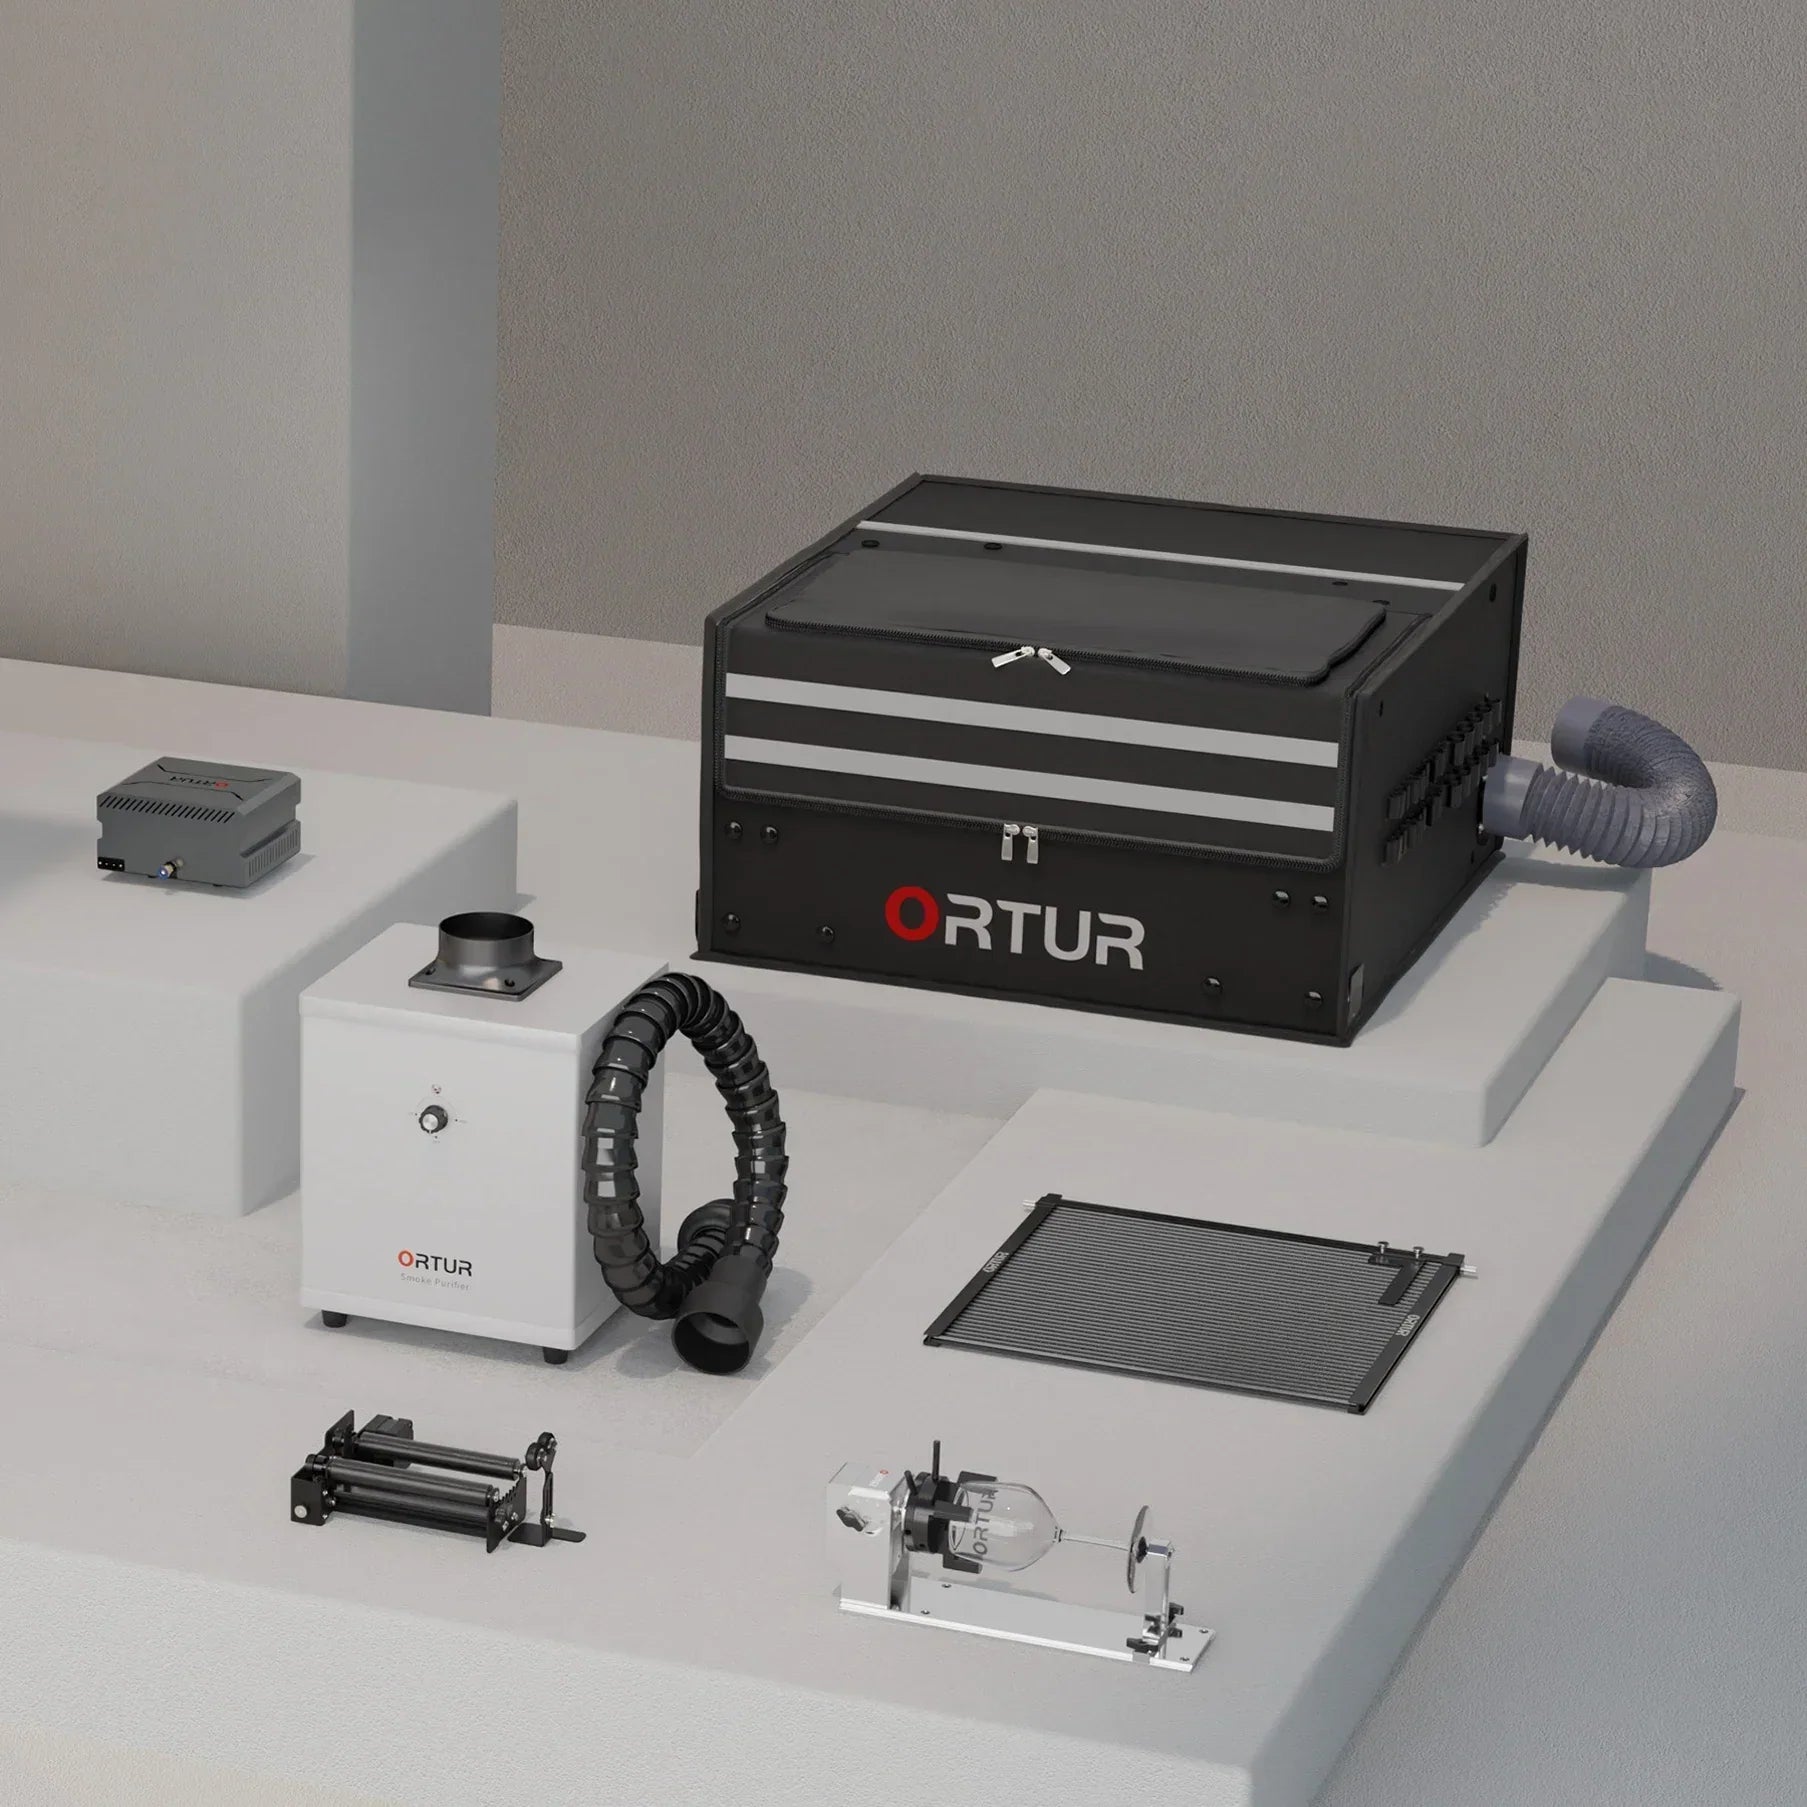
After opening the package, don’t rush to assemble the machine. Spend 1 minute checking the accessories to avoid finding missing items halfway through the subsequent operations. Beginners need to focus on confirming the following core items:
Essential Core Accessories List (with Uses for Beginners)
| Accessory Name | Quantity | Must-Know Uses for Beginners | Notes |
|---|---|---|---|
| ORTUR R1 Laser Engraving Machine Host | 1 unit | The core working unit; all operations revolve around the host | Check if the laser hood and machine body are in good condition |
| 24V/2A Power Adapter | 1 piece | Powers the host; must use the original adapter (do not mix with other adapters) | Ensure the adapter plug is undamaged and the cable is not broken |
| Test Material Set | 1 set | Includes 4 test wood chips, 1 test acrylic sheet, and 1 test aluminum sheet | Used exclusively for initial machine testing; avoid wasting your own materials |
| Tool Set | 1 set | 1 wrench (for tightening screws during assembly) and 2 triangular blades (for smoke exhaust during cutting) | Do not lose the wrench; it will be used for subsequent maintenance |
| Connection Accessories | 1 set | 1 USB data cable (for connecting to a computer) and 1 USB key (required for starting the machine) | The USB key must be inserted to start the machine; it is recommended to remove it when not in use;It prevents children from using the machine on their own without supervision. |
| Focus Plate | 1 piece | Calibrates the laser focus for clearer engraving | Do not drop it to avoid deformation |


What to Do If Accessories are Missing?
If you find that key accessories such as the adapter, USB key, or wrench are missing, don’t panic:
- First, check the gaps in the packaging foam (small parts may be stuck in there);
- If the accessories are indeed missing, directly log in to the ORTUR official website (https://ortur.net/) to contact online customer service or send an email to support@ortur.net. Provide your order number, the name and photos of the missing accessories. After verification by customer service, the missing accessories will be reissued free of charge.
5-step Assembly
Assemble Correctly in One Go Even with No Experience
Many beginners are afraid of "damaging the machine due to incorrect assembly". In fact, the ORTUR R1 is designed for easy assembly. Just remember two key points: "listen for the click sound" and "check the direction", and you can finish the assembly in a few minutes without using complex tools.
Step-by-step Assembly Tutorial (with Tips to Avoid Mistakes)
Special Reminder: Laser Modules are Pre-installed for LR4-1A/LU3-5B Models!
For the ORTUR R1 LR4-1A or LU3-5B models, there is no need to install the laser module separately — it is pre-installed before leaving the factory. You can skip the "laser module assembly" step and use the machine directly after assembling the host, making it even more convenient for beginners.
First Engraving
Create Your First Work in 3 Steps (Taking Wood Chip Letter Engraving as an Example)
After assembling the machine, beginners are most looking forward to "creating their first work". However, do not rush to adjust complex parameters. Use the standard test wood chips and simple patterns, and you can complete the engraving in 3 steps, which will give you a great sense of accomplishment.
- Must Insert: USB key(Insert it into the USB port of the host or the machine cannot be started without the USB key)
- Must Connect: Power cord (Insert it under the "DC 24V" mark)
- Must Connect: USB data cable (Insert one end into the USB port of the host and the other end into the computer. Do not use an extension cable to avoid poor contact)

Choose LaserGRBL for PC or ORTUR APP for Mobile
If you prefer to use a computer for the operation, the ORTUR R1 supports LaserGRBL (Free) and LightBurn (Paid with more functions). Beginners can start with LaserGRBL to minimize the learning spend, then switch to LightBurn once you gain experience. If you prefer to use a mobile phone for the operation, the ORTUR APP is a good choice. Follow these steps according to your preference:

Download for PC
Open the "Software Support" page on the ORTUR official website , find "LaserGRBL", and click the download button to start downloading.

Download for Mobile
Open the "Software Support" page on the ORTUR official website . You can also search for "ORTUR" in the App Store or Google Play to download the App.
· The App supports WiFi/AP connection, and the stable remote control distance of the App is within a 10-meter radius.
Follow the Steps, Do Not Adjust Parameters Randomly

Step 1: Place the Material
Put the Test Wood Chip in the Middle, Do Not Tilt It
Operation: Open the laser hood, place the standard test wood chip (horizontal) in the middle of the engraving platform, and press it gently to ensure the material is flat (do not let it curl, otherwise the engraving will be misaligned).

Step 2: Calibrate the Focus
Use the Focus Plate, Done in 10 Seconds
Operation: Take out the focus plate, place it on the wood chip, and let the upper and lower ends of the focus plate respectively press against the laser module and the wood chip; loosen the screw next to the laser module, slowly lower the module until it just touches the focus plate, then tighten the screw — this completes the focus calibration.

Step 3: Set Parameters + Start Engraving
Copy the Beginner Presets Directly, No Mistakes
Operation:
1. Select an engraving pattern in the App: Adjust the size of the engraving pattern according to the size of the engraving material.
2. Select parameters: Click "Parameter Settings", select "Wood" as the material. The App will automatically display the beginner preset parameters, directly click "Confirm" (parameters can be adjusted according to actual conditions).
3. Start engraving: Close the laser hood, click the "Start" button in the App. At this time, the white indicator light on the host will stay on, and the laser head will start moving for engraving. The process will take about a few minutes.

Step 4: Take Out the Work
Do Not Touch It Directly with Your Hands After Engraving
Operation: After the engraving is completed, the machine will stop automatically, and the white indicator light will start breathing (standby mode). Then open the laser hood, take out the wood chip. You can use the standard brush to sweep off the wood chips on the surface, and your first work is completed!
Must-Know for Beginners
3 Key Mistake-avoidance Tips for "First-time" Operations
| Issue | Checks to Perform |
|---|---|
| No Response When Starting the Machine for the First Time? | - Is the USB key inserted? (The machine cannot be started without the USB key.) - Is the power adapter plugged in tightly? (Check both the host end and the socket end.) - Is the laser hood fastened tightly? (If not fastened tightly, the safety protection will be triggered, and the machine will not be powered on.) |
| 24V/2A Power Adapter | - Is the focus calibrated? (Incorrect focus will cause the laser to disperse, resulting in shallow engraving). - Is the lens clean? (The lens of a new machine has a protective film, be sure to tear it off first!) |
| Machine Shakes After First Assembly? | - Did you hear a "click" sound when flipping the host? (If not, the host is not locked tightly, leading to shaking.) - Is the base plate inserted all the way? (If not inserted all the way, the machine body will be unstable.) |
Tips for Beginners to Advance
After completing the first wood chip letter engraving, you can try engraving on the test acrylic sheet to gradually get familiar with the engraving results of different materials. If you encounter problems, don’t panic — first check the status of the indicator lights (for example, a flashing red light indicates a fault, and a steady yellow light means waiting for calibration), then refer to this guide. Most beginner problems can be solved.
The ORTUR R1 is very beginner-friendly. There’s no need to fear "not being able to learn it". You will master it proficiently after a few tries. Next, you can explore more interesting engraved works such as keychains, bookmarks, and personalized accessories!